

Image Optimization to Speed Up Your Website Loading
Have you ever stopped to think about how important images are on your website? They are essential for creating an engaging and attractive experience for your visitors. But are you making the most of this visual resource? The truth is, if images are not properly optimized, they can become a real villain, hurting your site’s performance and usability.
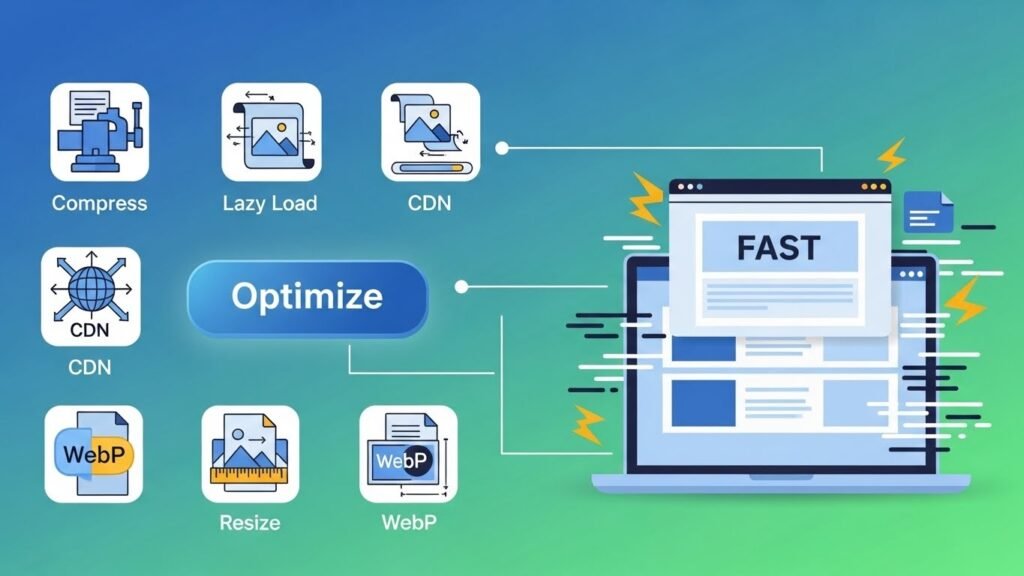
In this article, we will explore essential image optimization techniques to speed up your website loading and ensure your visitors have a smooth and enjoyable experience. Get ready to dive into a world of practical tips and powerful tools that will transform the way you handle images in your online business.
Why Is Image Optimization So Important?
Images are a fundamental element of any modern website. They capture attention, convey information visually, and help tell your brand’s story. However, if these images are not properly optimized, they can become a real obstacle to your site’s performance.
Imagine a website packed with high-quality, large-sized images. Each of these heavy images can significantly increase page load time. And what does that mean in practice? A frustrating user experience with frozen, slow pages, and consequently, lower engagement, higher bounce rates, and ultimately, lost traffic and conversions.
Therefore, image optimization is not just a best practice but an absolute necessity for any website that wants to stand out and deliver an exceptional experience to its visitors. Let’s dive into the key techniques to achieve this.
Essential Image Optimization Techniques
1. Choose the Right Image Format
The first step to optimizing your website’s images is choosing the right format. The main image formats used on the web are JPEG, PNG, GIF, and SVG, each with its own characteristics and applications.
The JPEG format is ideal for photographic images, as it offers an excellent balance between quality and file size. PNG is the right choice for graphics, logos, and images with transparency. GIF is useful for simple animations, while SVG is perfect for vector images like icons and illustrations.
By selecting the correct format, you can significantly reduce file size without compromising visual quality.
2. Reduce Image Size
Another fundamental technique is reducing image size. This can be done in several ways, such as cropping, resizing, and compressing images.
Start by analyzing whether the image has the ideal dimensions for your site. Often, images are uploaded at larger sizes than necessary, which hurts performance. Use image editing tools like Photoshop or Canva to adjust image sizes according to your layout needs.
Additionally, explore image compression techniques, such as reducing JPEG quality or optimizing PNG images. Find the perfect balance between quality and file size to achieve the best results.
3. Use Image Compression
Image compression is a powerful technique for reducing file sizes without losing visual quality. There are different levels of compression, each with its own impact on the image.
Lossless compression, such as that used in the PNG format, keeps the image quality intact while reducing file size. Lossy compression, like that in the JPEG format, reduces file size but may result in a slight loss of quality.
There are several online tools and services that offer image compression, such as TinyPNG, Optimizilla, and Squoosh. Try different options and find the one that best suits your needs.
4. Implement Lazy Loading
Lazy loading is a technique that loads images as needed by the user, rather than loading them all at once. This means that images not initially visible on the screen will only be loaded when the user scrolls the page.
This approach can significantly improve your site’s initial load time, as only the necessary images will be downloaded. This results in a faster and smoother experience for the user, increasing the likelihood of them staying on your site and engaging with your content.
5. Use Responsive Images
Responsive images automatically adapt to different screen sizes, ensuring the image is displayed optimally on any device. This is crucial, as users access websites from a wide variety of devices, from large desktop computers to smartphones and tablets.
By implementing responsive images, you can reduce the size of images delivered to different devices, optimizing performance and user experience. This technique, combined with the other approaches mentioned, forms a powerful toolkit for speeding up your website loading.
Conclusion
Image optimization is essential for improving the performance and user experience of your website. By applying techniques such as choosing the right format, reducing image size, using compression, lazy loading, and responsive images, you’ll be taking a big step toward turning your website into a true success.
Remember that image optimization is an ongoing process. Regularly analyze your site’s performance, identify areas for improvement, and make the necessary adjustments. This way, you’ll ensure your visitors have an incredible experience, which will translate into greater engagement, more conversions, and ultimately, a more thriving business.
Want your business to generate sales and traffic? Contact Us! And take your business to the next level!
To deepen your knowledge, also check out: